refer to: https://documentation.wazuh.com/current/installation-guide/index.html
目前发现自动安装有很大的坑:
1. virtualbox 不行(空间不够,翻墙等问题),aliyun hk不行。
2. indexer, server的名字最好不要改动(indexer 叫node-1,不要改)。 否则会有很大的问题。 ip 也不要改为0.0.0.0
3. 对着文档做的时候一个不小心,name错了,就全盘无法恢复(最大的坑在于server的安装时候,一回滚,就会把最关键的 /var/ossec 文件夹删掉。
4. 要求最低 2c 4g ,但是阿里云的2c4g会被评价为不合格,所以需要4c8g,硬盘空间25G不够,我弄了50G。暂时。
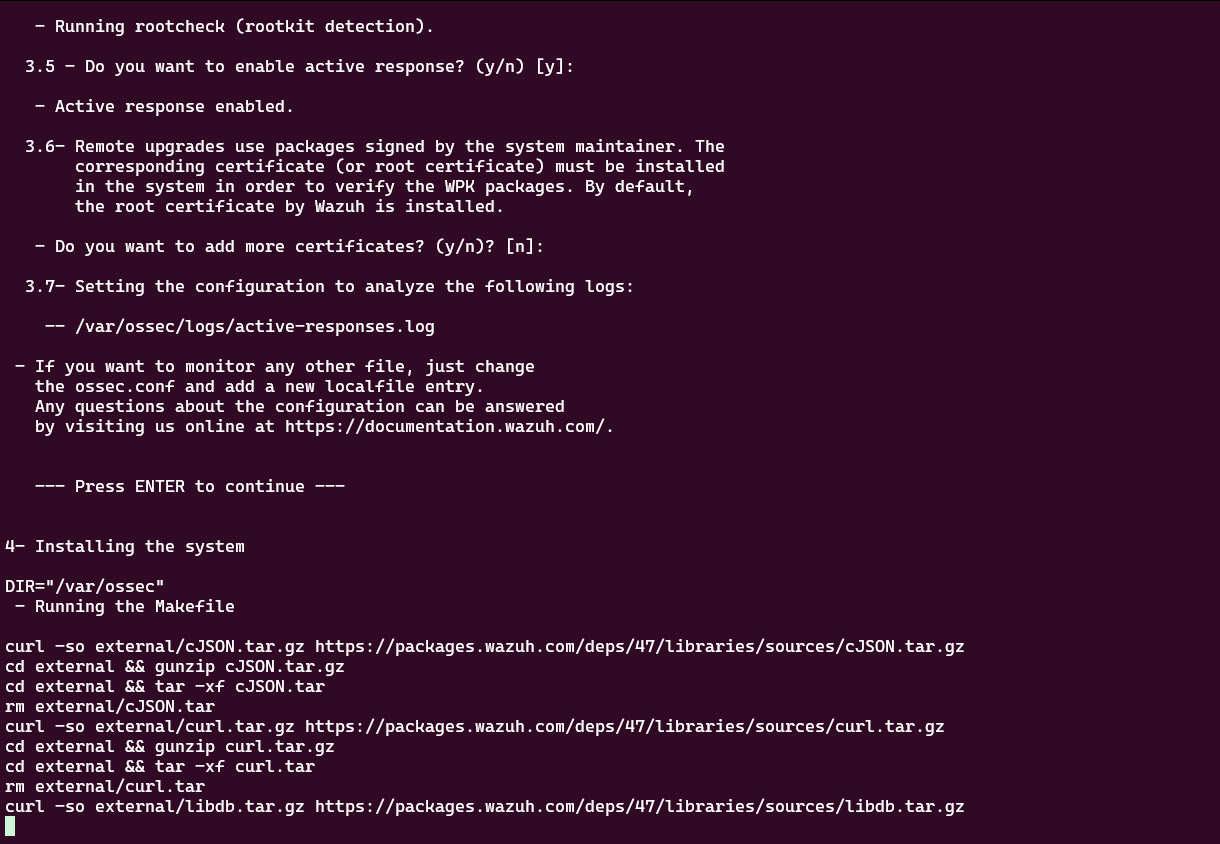
5. 建议手动安装 (step by step)
6. 安装时,盯着 /var/log/wazuh-install.log , 这里会有失败的线索。 而且自动安装时最好加上 --debug 参数
如果遇到问题,就看详细的步骤(step by step),例如;https://documentation.wazuh.com/current/installation-guide/wazuh-server/step-by-step.html
1、手动安装过程
(确认服务器是 >= 4c8g的。 普通的2c4g 会被程序认为不符合最低标准,硬盘必须大约40G以上)
1.1 创建证书
https://documentation.wazuh.com/current/installation-guide/wazuh-indexer/step-by-step.html
curl -sO https://packages.wazuh.com/4.13/wazuh-certs-tool.sh
curl -sO https://packages.wazuh.com/4.13/config.yml
注意,该config.yml 不要修改对应的name. 否则后面对着文档做的时候一个不小心,name错了,就全盘无法恢复(最大的坑在于server的安装时候,一回滚,就会把最关键的 /var/ossec 文件夹删掉。
修改 config.yml 后,把它做个copy: (因为该文件被打包后就看不到了)
cp config.yml config.yml.bak
只修改里面的ip地址,使用内网IP,外网IP会报错。(跑起来后使用nginx做反向代理)
bash ./wazuh-certs-tool.sh -A 生成证书
tar -cvf ./wazuh-certificates.tar -C ./wazuh-certificates/ . 压缩
(不要删除这个文件夹和 wazuh-certificates.tar ,后面有用!)
1.2 增加 wazuh repo
下面的apt 操作,如果indexer, server, dashboard都位于同一个机器的话,只操作一次即可。
apt-get install gnupg apt-transport-https
curl -s https://packages.wazuh.com/key/GPG-KEY-WAZUH | gpg --no-default-keyring --keyring gnupg-ring:/usr/share/keyrings/wazuh.gpg --import && chmod 644 /usr/share/keyrings/wazuh.gpg
echo "deb [signed-by=/usr/share/keyrings/wazuh.gpg] https://packages.wazuh.com/4.x/apt/ stable main" | tee -a /etc/apt/sources.list.d/wazuh.list
apt-get update
确认端口:
server的端口 https://documentation.wazuh.com/current/getting-started/architecture.html#default-ports
1514, agent 连接服务
1515 agent enroll service
1516 cluster daemon
514 syslog collector
55000 server api
9200 indexer api
9300-9400 indexer cluster 通讯
443 dashboard
1.3 安装indexer
apt-get -y install wazuh-indexer
编辑:/etc/wazuh-indexer/opensearch.yml
ip: 跟config.yml 中的一模一样。
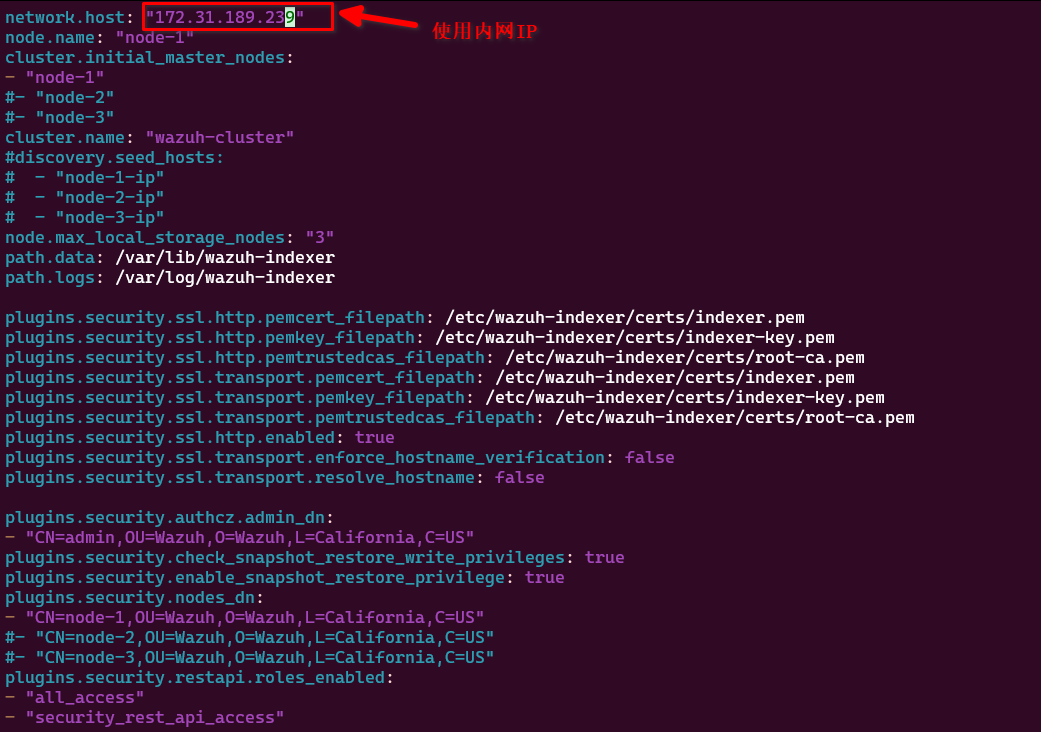
NODE_NAME=node-1
mkdir /etc/wazuh-indexer/certs
tar -xf ./wazuh-certificates.tar -C /etc/wazuh-indexer/certs/ ./$NODE_NAME.pem ./$NODE_NAME-key.pem ./admin.pem ./admin-key.pem ./root-ca.pem
mv -n /etc/wazuh-indexer/certs/$NODE_NAME.pem /etc/wazuh-indexer/certs/indexer.pem
mv -n /etc/wazuh-indexer/certs/$NODE_NAME-key.pem /etc/wazuh-indexer/certs/indexer-key.pem
chmod 500 /etc/wazuh-indexer/certs
chmod 400 /etc/wazuh-indexer/certs/*
chown -R wazuh-indexer:wazuh-indexer /etc/wazuh-indexer/certs
( 该文件务必保留 !!! ,后面安装server的时候有大用 )
启动service:
systemctl daemon-reload
systemctl enable wazuh-indexer
systemctl start wazuh-indexer
1.4 安装 server ( server包含了manager )
参考: https://documentation.wazuh.com/current/installation-guide/wazuh-indexer/step-by-step.html
apt-get install gnupg apt-transport-https
curl -s https://packages.wazuh.com/key/GPG-KEY-WAZUH | gpg --no-default-keyring --keyring gnupg-ring:/usr/share/keyrings/wazuh.gpg --import && chmod 644 /usr/share/keyrings/wazuh.gpg
echo "deb [signed-by=/usr/share/keyrings/wazuh.gpg] https://packages.wazuh.com/4.x/apt/ stable main" | tee -a /etc/apt/sources.list.d/wazuh.list
apt update
apt-get -y install wazuh-manager 400+ MB
apt-get -y install filebeat 22MB
配置filebeat
curl -so /etc/filebeat/filebeat.yml https://packages.wazuh.com/4.13/tpl/wazuh/filebeat/filebeat.yml
修改该文件的ip即可。(127.0.0.1 -> 你的机器内网IP, 跟config.yml 中的一样,因为证书就是这样生成的,证书只认该ip)
filebeat keystore create
echo admin | filebeat keystore add username --stdin --force 用户名是admin
echo admin | filebeat keystore add password --stdin --force 密码也是admin
下载wazuh indexer的告警template
curl -so /etc/filebeat/wazuh-template.json https://raw.githubusercontent.com/wazuh/wazuh/v4.13.1/extensions/elasticsearch/7.x/wazuh-template.json
chmod go+r /etc/filebeat/wazuh-template.json
安装wazuh的filebeat module:
curl -s https://packages.wazuh.com/4.x/filebeat/wazuh-filebeat-0.4.tar.gz | tar -xvz -C /usr/share/filebeat/module
cp wazuh-certificates/node-1.pem /etc/filebeat/certs/filebeat.pem
cp wazuh-certificates/node-1-key.pem /etc/filebeat/certs/filebeat-key.pem
cp wazuh-certificates/root-ca.pem /etc/filebeat/certs/root-ca.pem
chmod 500 /etc/filebeat/certs/
chmod 400 /etc/filebeat/certs/*
chown root:root /etc/filebeat/certs/
设置 filebeat的用户名和密码:
echo 'admin' | /var/ossec/bin/wazuh-keystore -f indexer -k username
echo 'admin' | /var/ossec/bin/wazuh-keystore -f indexer -k password
编辑filebeat配置文件:
vim /var/ossec/etc/ossec.conf 替换如下内容:
0.0.0.0 -> 你机器的真实IP (大概是2处)
启动 manager:
systemctl daemon-reload
systemctl enable wazuh-manager
systemctl start wazuh-manager
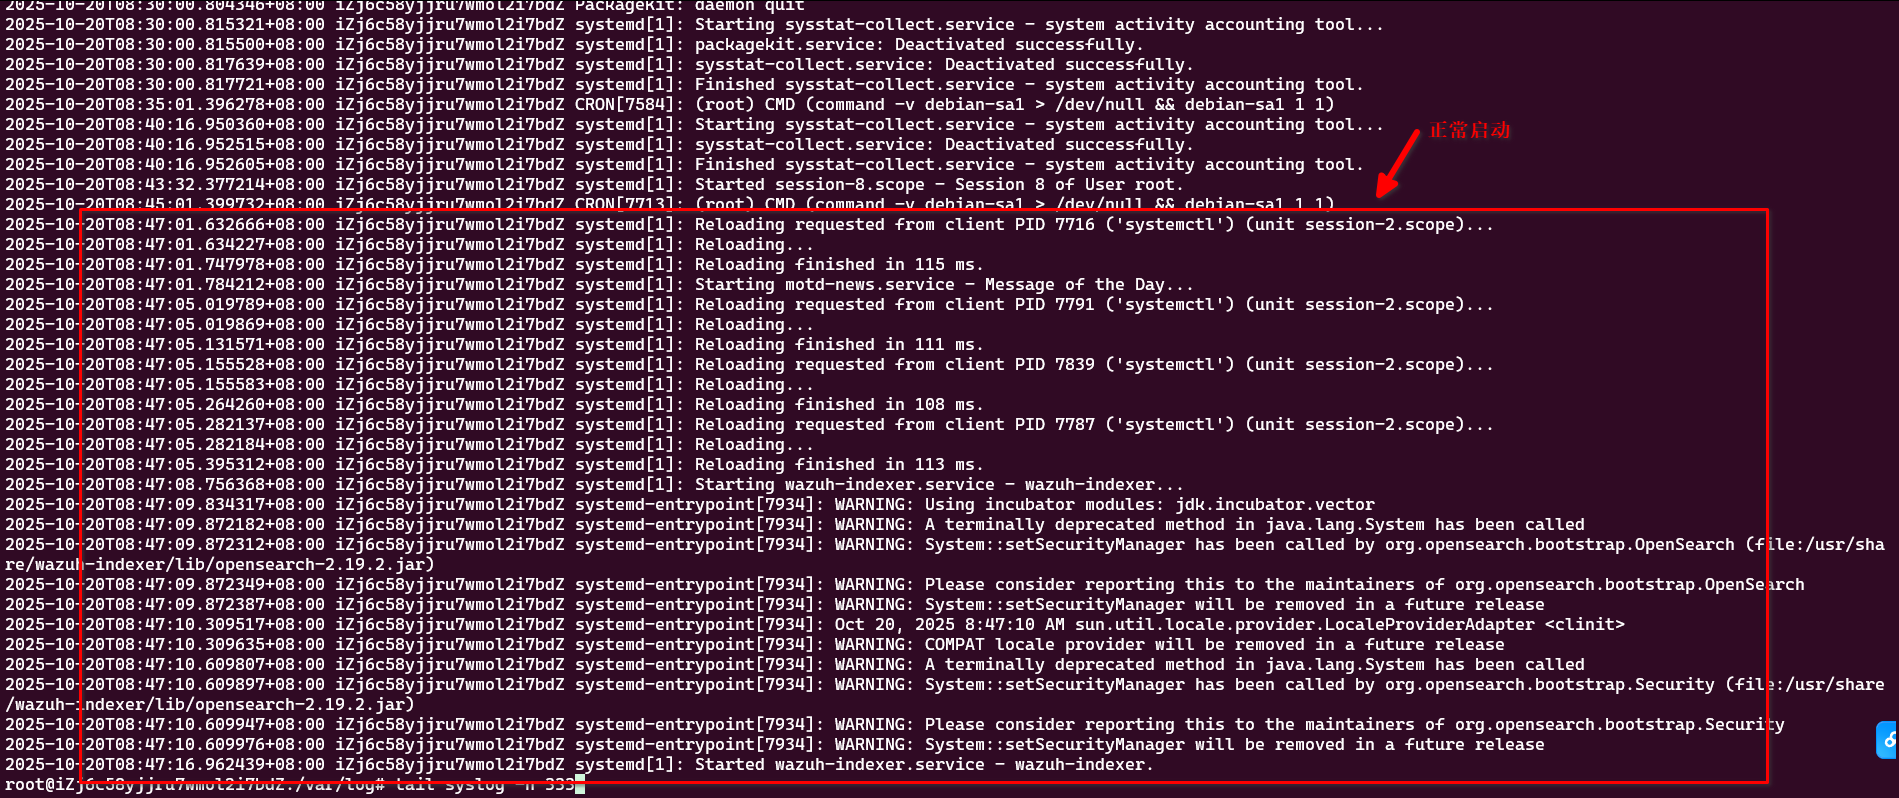
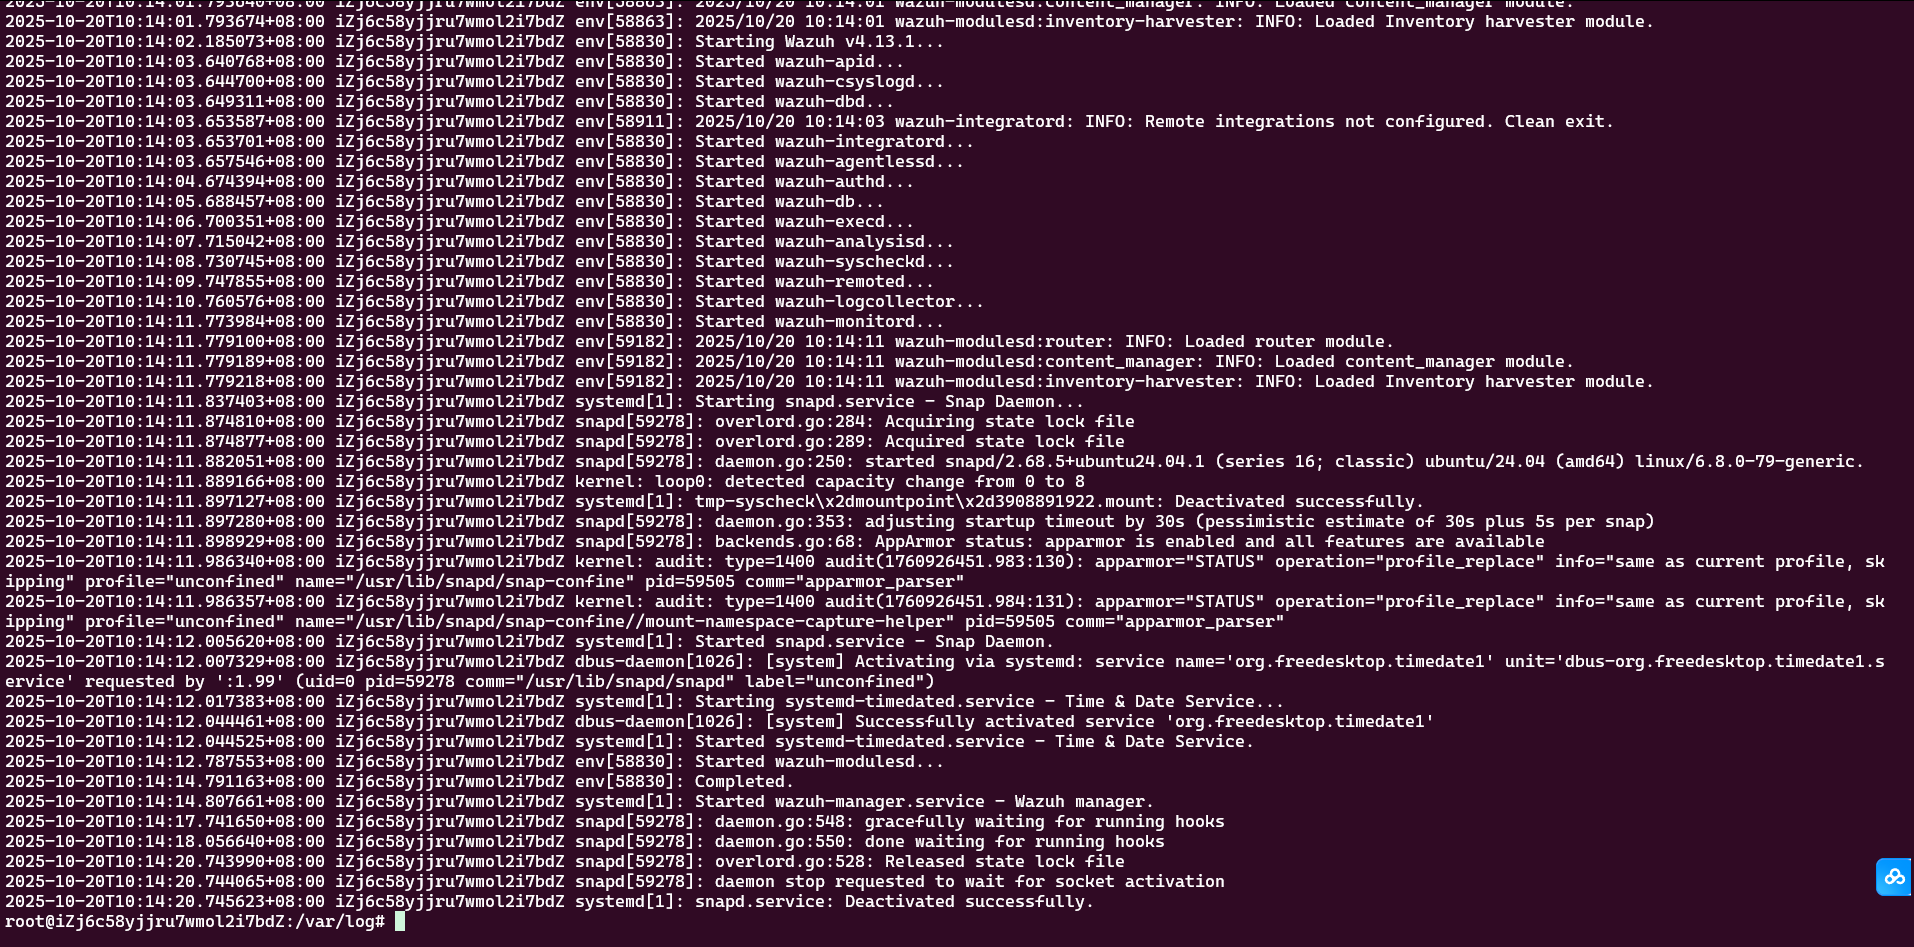
观察日志 /var/log/syslog
没报错就是正常了(我说了句废话)
启动 filebeat:
systemctl daemon-reload
systemctl enable filebeat
systemctl start filebeat
然后测试 filebeat: filebeat test output
遇到问题:
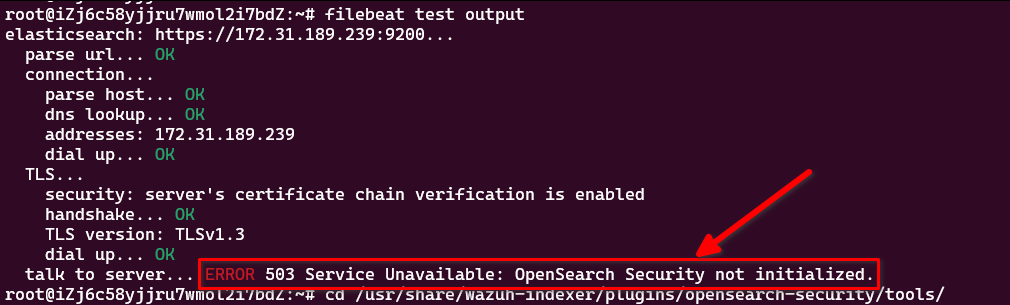
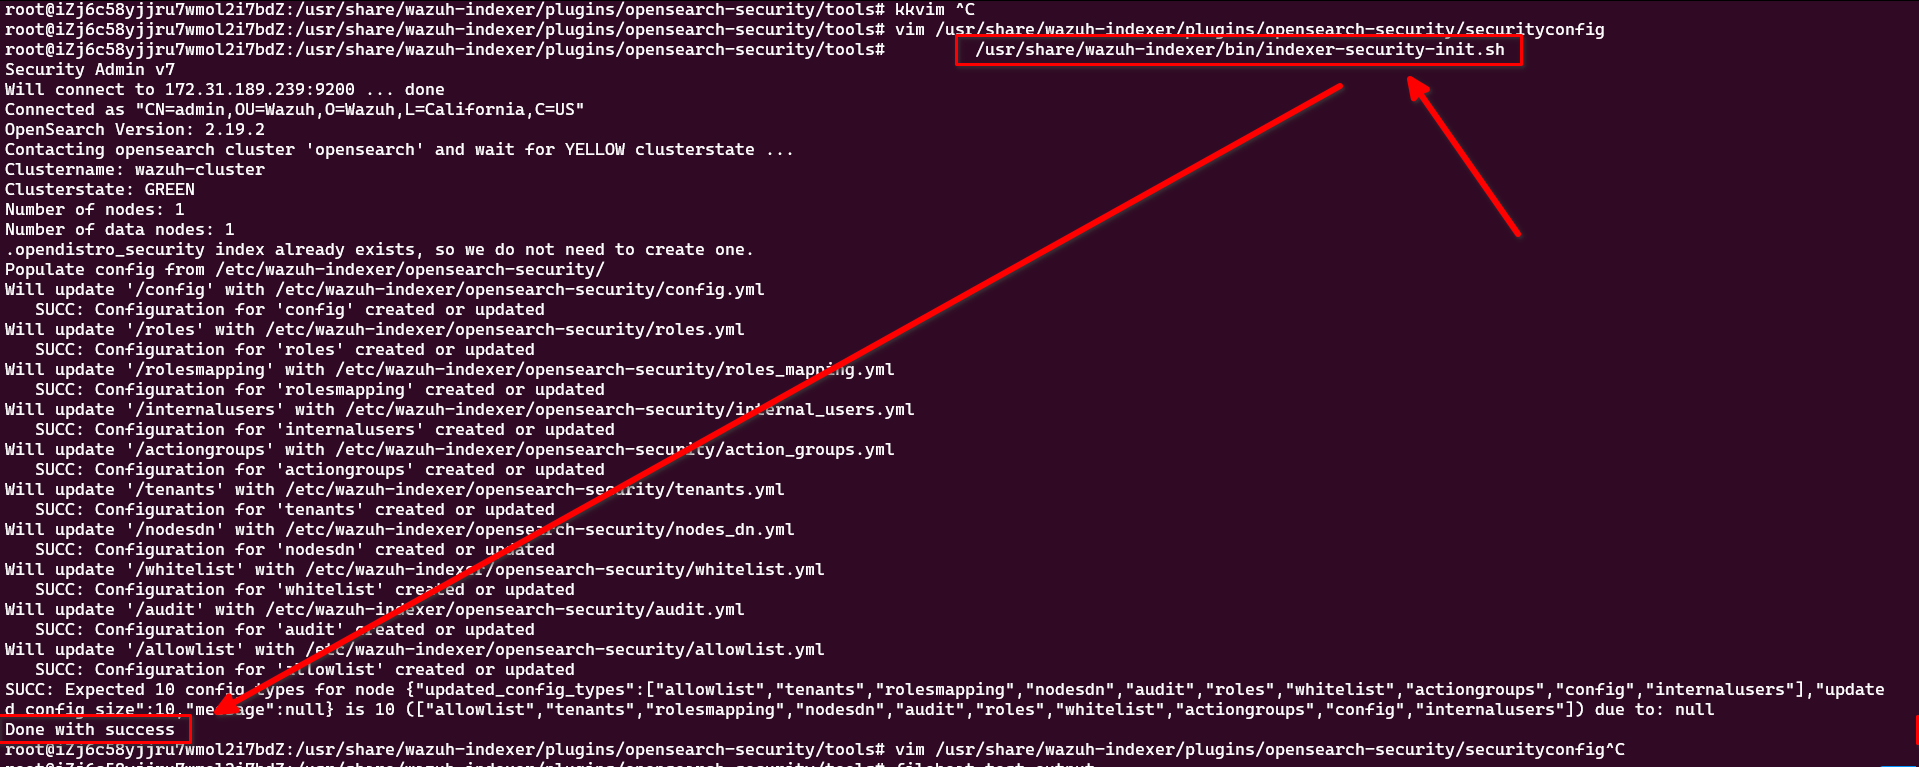
talk to server... ERROR 503 Service Unavailable: OpenSearch Security not initialized.
运行命令:/usr/share/wazuh-indexer/bin/indexer-security-init.sh
就可以了。
1.5 安装dashboard
refer to: https://documentation.wazuh.com/current/installation-guide/wazuh-dashboard/step-by-step.html
apt-get install debhelper tar curl libcap2-bin #debhelper version 9 or later
apt-get -y install wazuh-dashboard (182mb)
vim /etc/wazuh-dashboard/opensearch_dashboards.yml
修改里面的ip,为config.yml 中的地址。 第一行的0.0.0.0 不用变
server.host: 0.0.0.0   (这个不用动)
server.port: 443
opensearch.hosts: https://172.31.189.239:9200  (这个IP需要修改, 参考 config.yml )
创建证书:
mkdir /etc/wazuh-dashboard/certs
cp wazuh-certificates/dashboard* /etc/wazuh-dashboard/certs/
cp wazuh-certificates/root-ca.pem /etc/wazuh-dashboard/certs/
chmod 500 /etc/wazuh-dashboard/certs
chmod 400 /etc/wazuh-dashboard/certs/*
chown -R wazuh-dashboard:wazuh-dashboard /etc/wazuh-dashboard/certs
systemctl daemon-reload
systemctl enable wazuh-dashboard
systemctl start wazuh-dashboard
配置:
vim /usr/share/wazuh-dashboard/data/wazuh/config/wazuh.yml
修改里面的IP为内网IP:
hosts:
  - default:
      url: https://172.31.189.239
      port: 55000
      username: wazuh-wui
      password: wazuh-wui
      run_as: false
重启该service: systemctl restart wazuh-dashboard
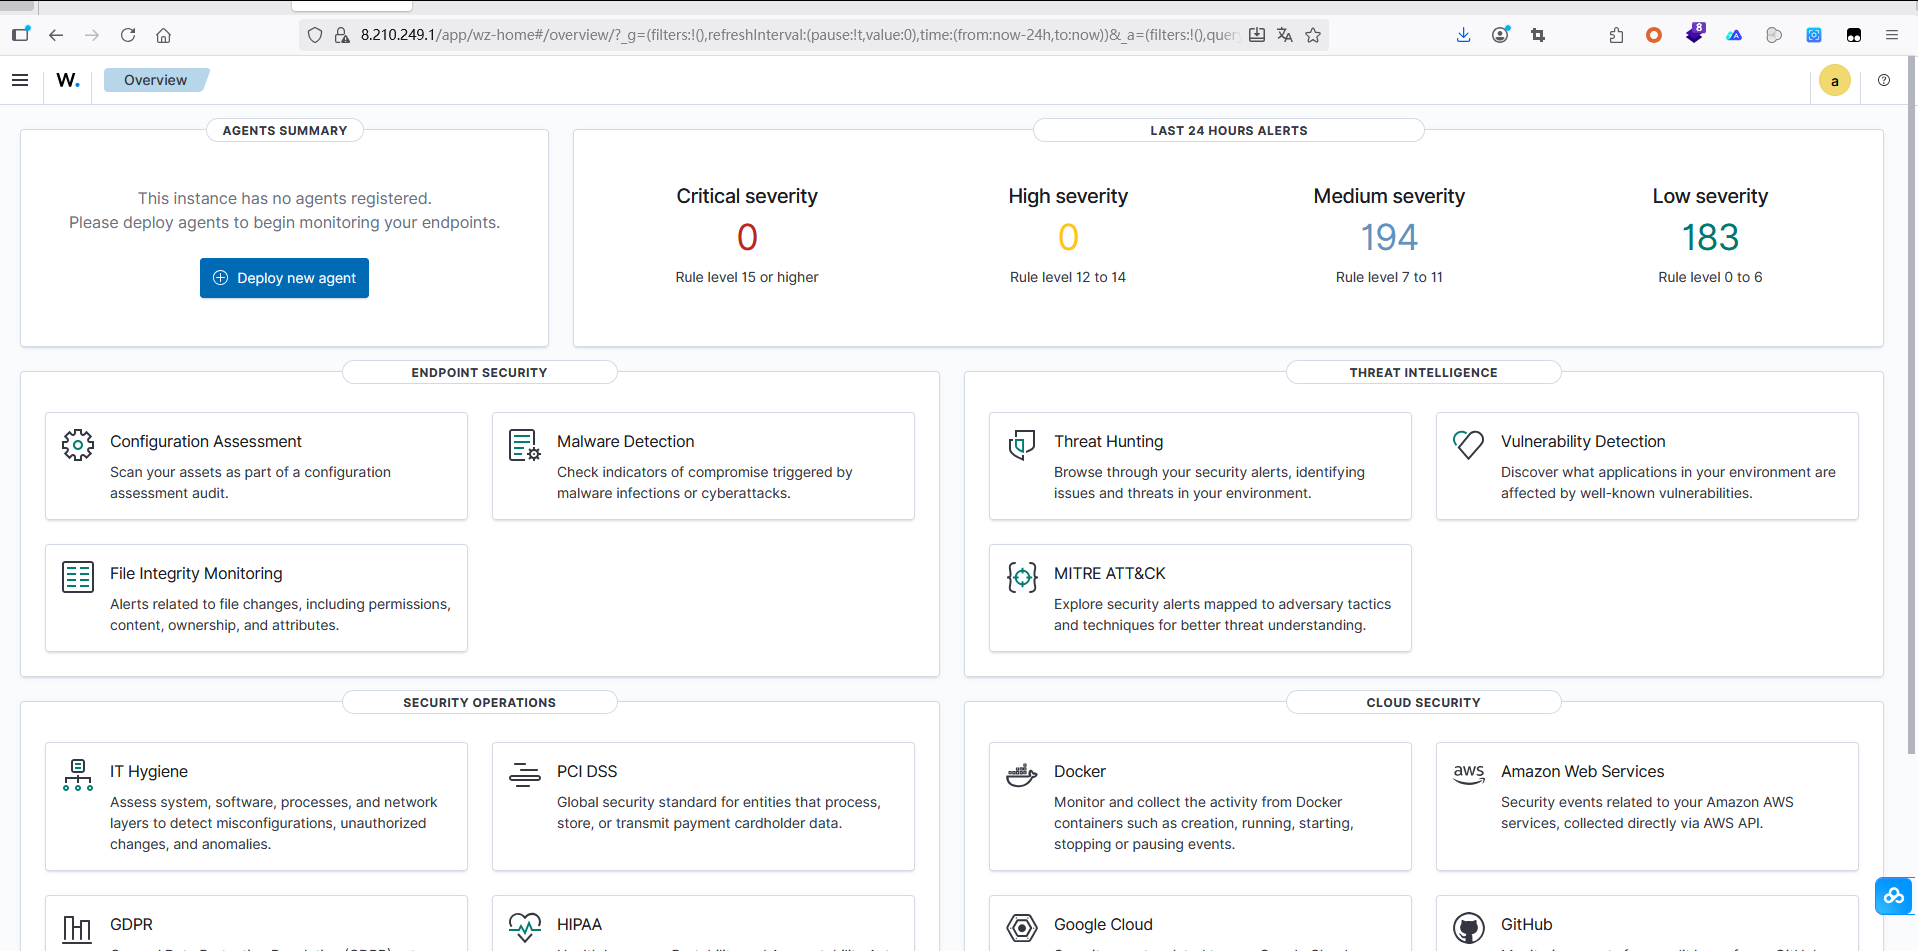
然后浏览器访问:https://8.210.249.1 就可以了。 用户名密码都是admin
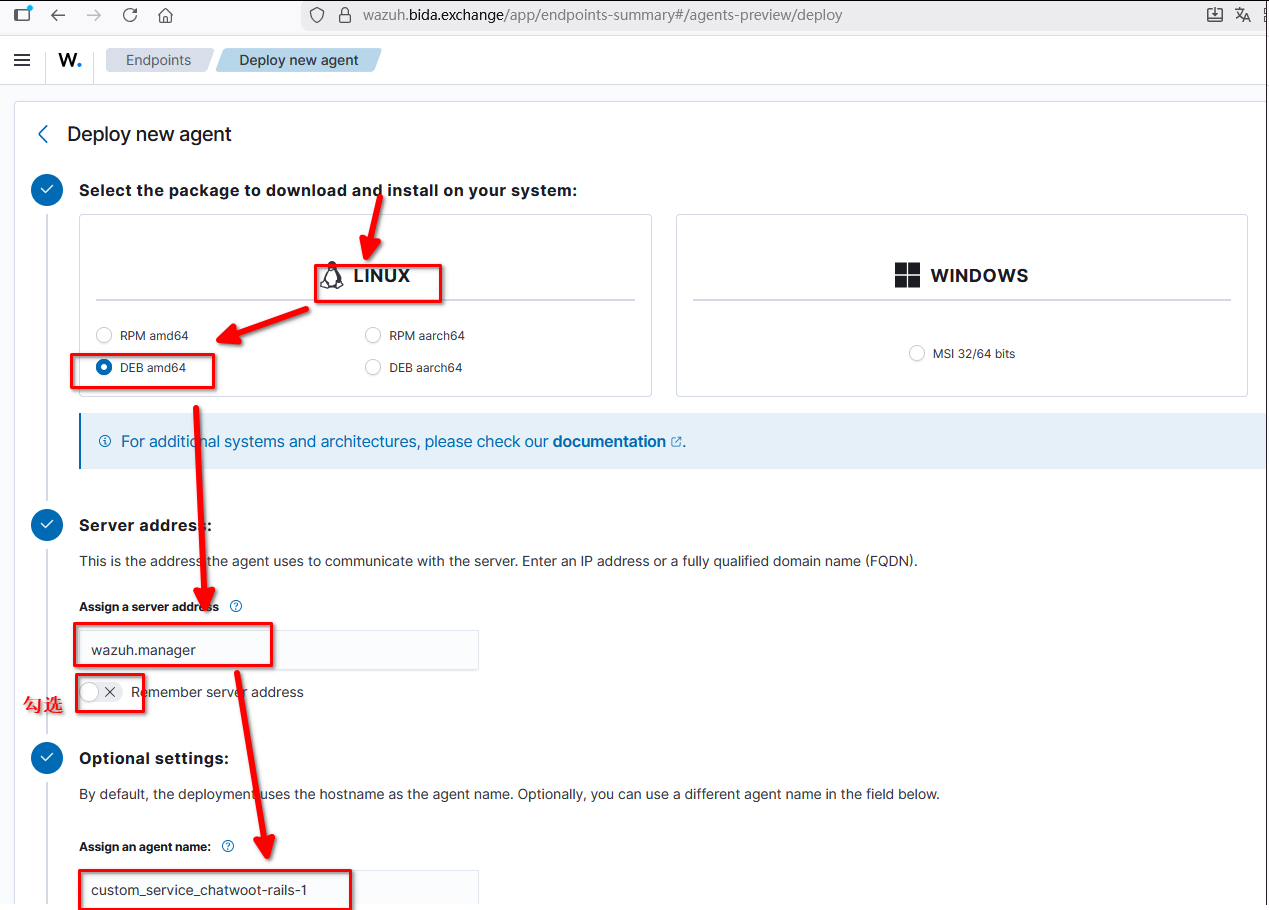
安装 agent (需要另外一个机器)
(对于docker中, apt install gpg )
curl -s https://packages.wazuh.com/key/GPG-KEY-WAZUH | gpg --no-default-keyring --keyring gnupg-ring:/usr/share/keyrings/wazuh.gpg --import && chmod 644 /usr/share/keyrings/wazuh.gpg
echo "deb [signed-by=/usr/share/keyrings/wazuh.gpg] https://packages.wazuh.com/4.x/apt/ stable main" | tee -a /etc/apt/sources.list.d/wazuh.list
apt update
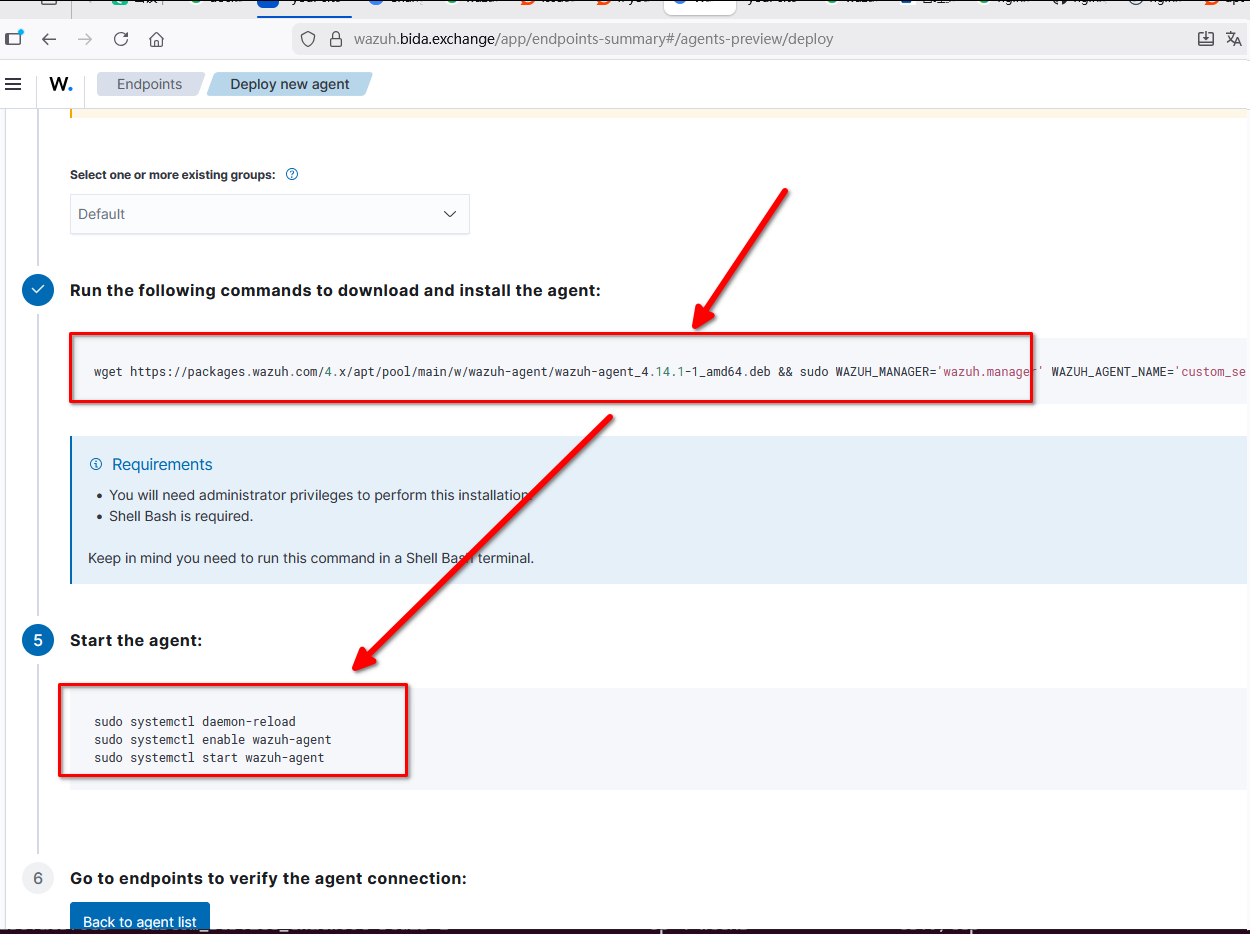
WAZUH_MANAGER="172.31.189.239" apt-get install wazuh-agent
systemctl daemon-reload
systemctl enable wazuh-agent
systemctl start wazuh-agent
(对于docker ,以上3个systemctl 不能使用,所以直接用:)
root@5a6f511e7e5a:/opt/app# /var/ossec/bin/wazuh-control start
Starting Wazuh v4.14.1...
Deleting PID file '/var/ossec/var/run/wazuh-agentd-2909.pid' not used...
Started wazuh-execd...
Started wazuh-agentd...
Started wazuh-syscheckd...
Started wazuh-logcollector...
Started wazuh-modulesd...
Completed.
第二个安装agent的方式: 可以在Dockerfile中指定
修改里面的参数(主要是 WAZUH_XXX 这两个变量)
wget https://packages.wazuh.com/4.x/apt/pool/main/w/wazuh-agent/wazuh-agent_4.14.1-1_amd64.deb && WAZUH_MANAGER='wazuh.manager' WAZUH_AGENT_NAME='exchange_backend_wallet_api' dpkg -i ./wazuh-agent_4.14.1-1_amd64.deb
(docker下面不行,因为最后需要systemctl , docker 没有该功能。所以需要手动修改一个.deb 或者修改Dockerfile . 具体我还没想好 )
2. 依次检查: wazuh-indexer, manager, filebeat, dashboard
2.1. copy 对应的cert 文件
2.2. 修改 .yml配置文件 /var/ossec/etc/ossec.conf
2.3. 重启对应服务 ( systemctl status wazuh-indexer, manager, dashboard, filebeat ) ...
第二个安装agent的方式
下载安装即可。
(1) Dockerfile:
FROM ruby:3.3.10-slim
WORKDIR /opt/app
COPY . .
# 增加对wazuh agent的支持
ARG WAZUH_MANAGER
ENV WAZUH_MANAGER=$WAZUH_MANAGER
ARG WAZUH_AGENT_NAME
ENV WAZUH_AGENT_NAME=$WAZUH_AGENT_NAME
RUN set -eux; \
  apt update; apt install -y curl gpg ; \
  curl -s https://packages.wazuh.com/key/GPG-KEY-WAZUH | gpg --no-default-keyring --keyring gnupg-ring:/usr/share/keyrings/wazuh.gpg --import && chmod 644 /usr/share/keyrings/wazuh.gpg ; \
  echo "deb [signed-by=/usr/share/keyrings/wazuh.gpg] https://packages.wazuh.com/4.x/apt/ stable main" | tee -a /etc/apt/sources.list.d/wazuh.list ; \
  apt update ; \
  apt-get install -y wazuh-agent ; \
  # 删除密码验证
  sed -i '/etc\/authd.pass<\/authorization_pass_path>/d' /var/ossec/etc/ossec.conf

CMD ["tail", "-f", "/dev/null"]
然后修改docker-compose.yml , 设置对应变量:
174   exchange_backend_cms_admin:
175     container_name: 'exchange_backend_cms_admin'
176     build:
177       context: /opt/app/backend_cms_admin
178       args:  (这里对应了Dockerfile中的ARGS )
179         WAZUH_MANAGER: wazuh.manager
180         WAZUH_AGENT_NAME: exchange_backend_cms_admin333
181     volumes:
182       - /opt/app/backend_cms_admin:/opt/app
184     command: ["sh", "-c", "echo 'start wazuh agent' && /var/ossec/bin/wazuh-control start && tail -f /dev/null"]
186     environment:
187       - DATABASE_HOST=exchange_mysql
188       - DATABASE_USERNAME=root
(暂时失败)对于alpine系统:支持从源代码安装:
https://documentation.wazuh.com/current/deployment-options/wazuh-from-sources/wazuh-agent/index.html
1. apk update
2. apk add --no-cache build-base linux-headers openssl-dev zlib-dev pcre-dev curl
apk add --no-cache gettext-dev gcc g++ make musl-dev libtool autoconf automake pkgconfig cmake
wget https://github.com/wazuh/wazuh/archive/refs/tags/v4.14.1.zip
unzip v4.14.1.zip
cd wazuh-4.14.1/
make -C src clean
make -C src clean-deps
cd src
make TARGET=agent deps
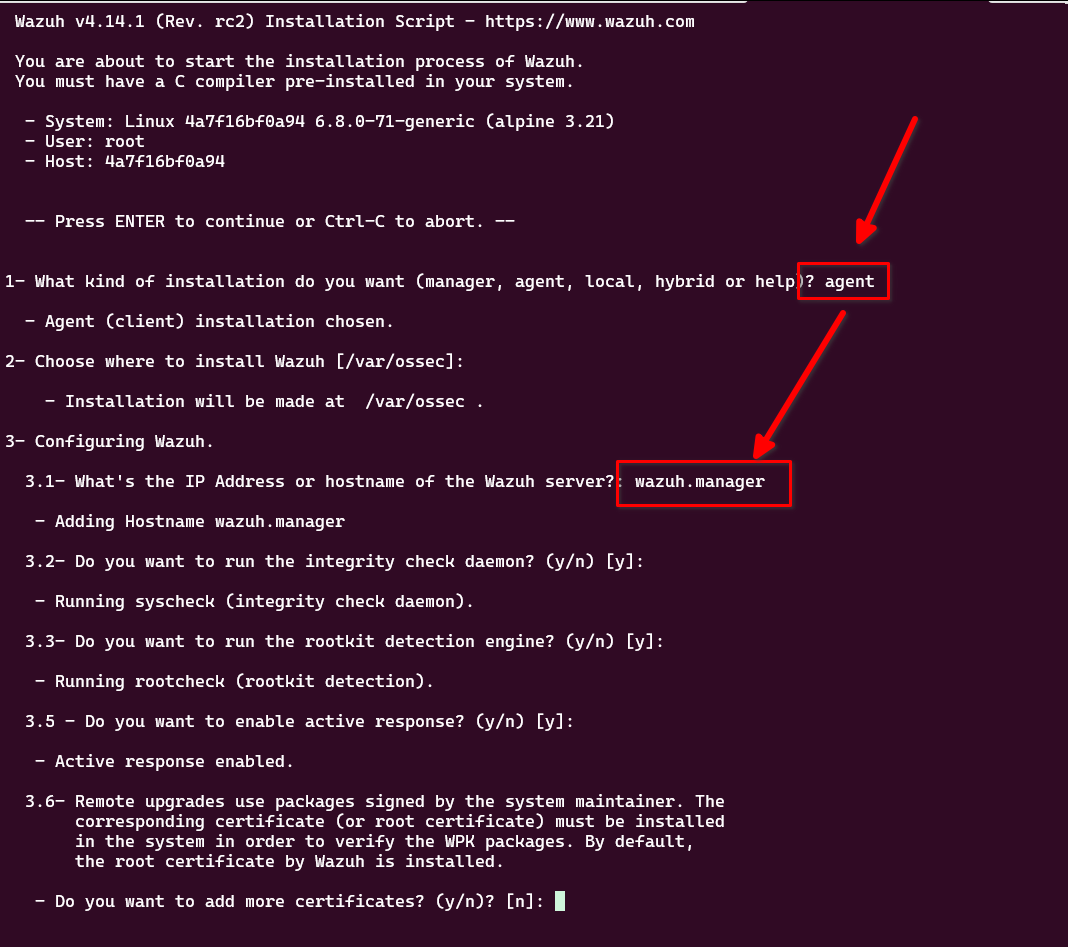
./install.sh 太有意思了哈哈:
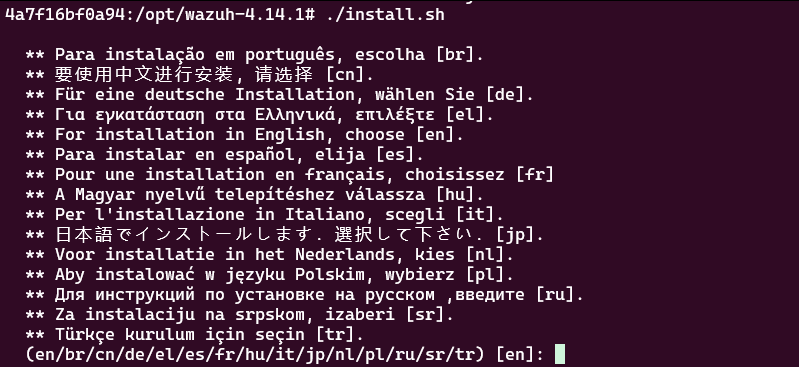
选择en ,后,一路next, 注意填好 wazuh.manager这个IP
失败了。后来经过查看,发现有更好的办法可以监控docker: https://documentation.wazuh.com/current/user-manual/capabilities/container-security/monitoring-docker.html
监控docker
1. 在docker的host 安装agent (略)
2. 安装python3
3. 对应的命令
pip3 install docker==7.1.0 urllib3==1.26.20 requests==2.32.2 --break-system-packages
Docker的安装方式
注意:先不要贸然修改密码。这个有点麻烦。先用默认docker的用户名密码
sysctl -w vm.max_map_count=262144
git clone https://github.com/wazuh/wazuh-docker.git -b v4.14.1
cd wazuh-docker/single-node
docker-compose -f generate-indexer-certs.yml run --rm generator (此步骤务必注意,要完全正确,不出错)
docker-compose up (此步骤也需要保证存在:http server running at https://0.0.0.0:5601 )
需要下载2~3个G,就可以了。
默认会在本地的443端口
运行启动后,大概1分钟 ,看日志中出现 0.0.0.0:5601 ... 就表示该服务器启动成功。
然后修改nginx配置;
server {
  listen 80 ;

  server_name wazuh.xxx.exchange;
  client_max_body_size       500m;
  charset utf-8;
  return 301 https://$host$request_uri;
}

server {
  listen       443 ssl;
  http2 on;
  server_name  wazuh.xxx.exchange;
  charset utf-8;

  ssl_certificate     /opt/ssl_files/xxx-exchange.pem;
  ssl_certificate_key /opt/ssl_files/xxx-exchange.key;
  ssl_session_timeout 1h;
  ssl_ciphers ECDHE-RSA-AES128-GCM-SHA256:ECDHE:ECDH:AES:HIGH:!NULL:!aNULL:!MD5:!ADH:!RC4;
  ssl_protocols TLSv1 TLSv1.1 TLSv1.2;
  ssl_prefer_server_ciphers on;

  location / {
    proxy_pass          https://wazuh_dashboard_servers;
    proxy_set_header    X-Forwarded-Proto https;
    proxy_set_header    X-Forwarded-For $proxy_add_x_forwarded_for;
    proxy_set_header    X-Real-IP $remote_addr;
    proxy_set_header    Host $http_host;
    proxy_next_upstream http_502 http_504 error timeout invalid_header;

    # 关键:跳过Wazuh自签证书的验证(因为是内部通信)
    proxy_ssl_verify    off;
    proxy_ssl_server_name on;  # 验证Wazuh的服务器名称

    # 超时配置(避免长连接断开)
    proxy_connect_timeout 30s;
    proxy_send_timeout 30s;
    proxy_read_timeout 30s;
  }
}

upstream wazuh_dashboard_servers{
  server wazuh.dashboard:5601;
}
同时,修改 wazuh docker-compose的配置,让它跟其他docker位于同一网络:
  wazuh.indexer:  (注意这里是例子,不完整)
    image: wazuh/wazuh-indexer:4.14.1
    hostname: wazuh.indexer
    restart: always
    #ports:
    #  - "9200:9200"
    volumes:
      - wazuh-indexer-data:/var/lib/wazuh-indexer
    networks:   (需要这个)
      - exchange-network
      - chatwoot_network

networks:  (需要这个)
  exchange-network:
    driver: bridge
    name: exchange-network  # 指定网络名称
    external: true
  chatwoot_network:
    external: true
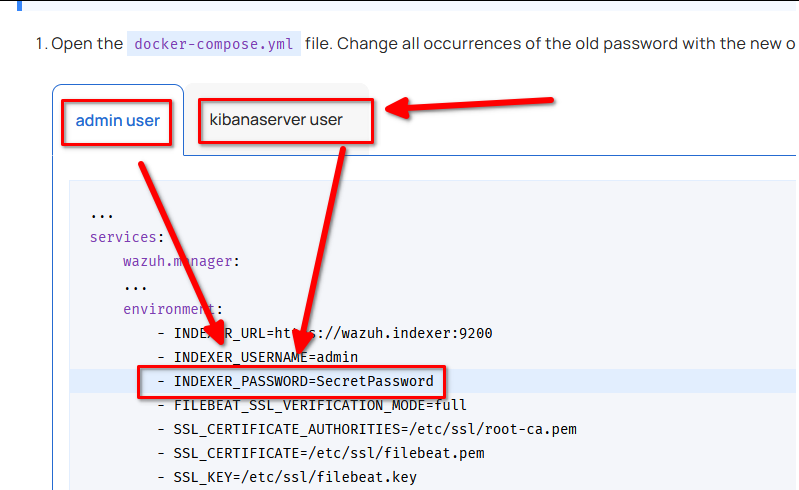
修改密码方法
1. 修改 docker-compose.yml 中的 admin, kibanaserver的密码.
docker run --rm -ti wazuh/wazuh-indexer:4.14.1 bash /usr/share/wazuh-indexer/plugins/opensearch-security/tools/hash.sh --password=moneymoneyXXXX 注意必须是14位长度,大小写,不能有特殊字符
可以获得生成 hash 的方式
填入到 docker-compose.yml 中,以及
/single-node/config/wazuh_indexer/internal_users.yml
修改里面的hash.
2. docker-compose down 保证关闭相关的docker
3. docker-compose up ,等待1-5分钟。先不要操作。确认启动
4. docker exec -it single-node-wazuh.indexer-1 bash
运行下面命令:可以一次性复制粘贴:
export INSTALLATION_DIR=/usr/share/wazuh-indexer
export CONFIG_DIR=$INSTALLATION_DIR/config
CACERT=$CONFIG_DIR/certs/root-ca.pem
KEY=$CONFIG_DIR/certs/admin-key.pem
CERT=$CONFIG_DIR/certs/admin.pem
export JAVA_HOME=/usr/share/wazuh-indexer/jdk
等几秒.
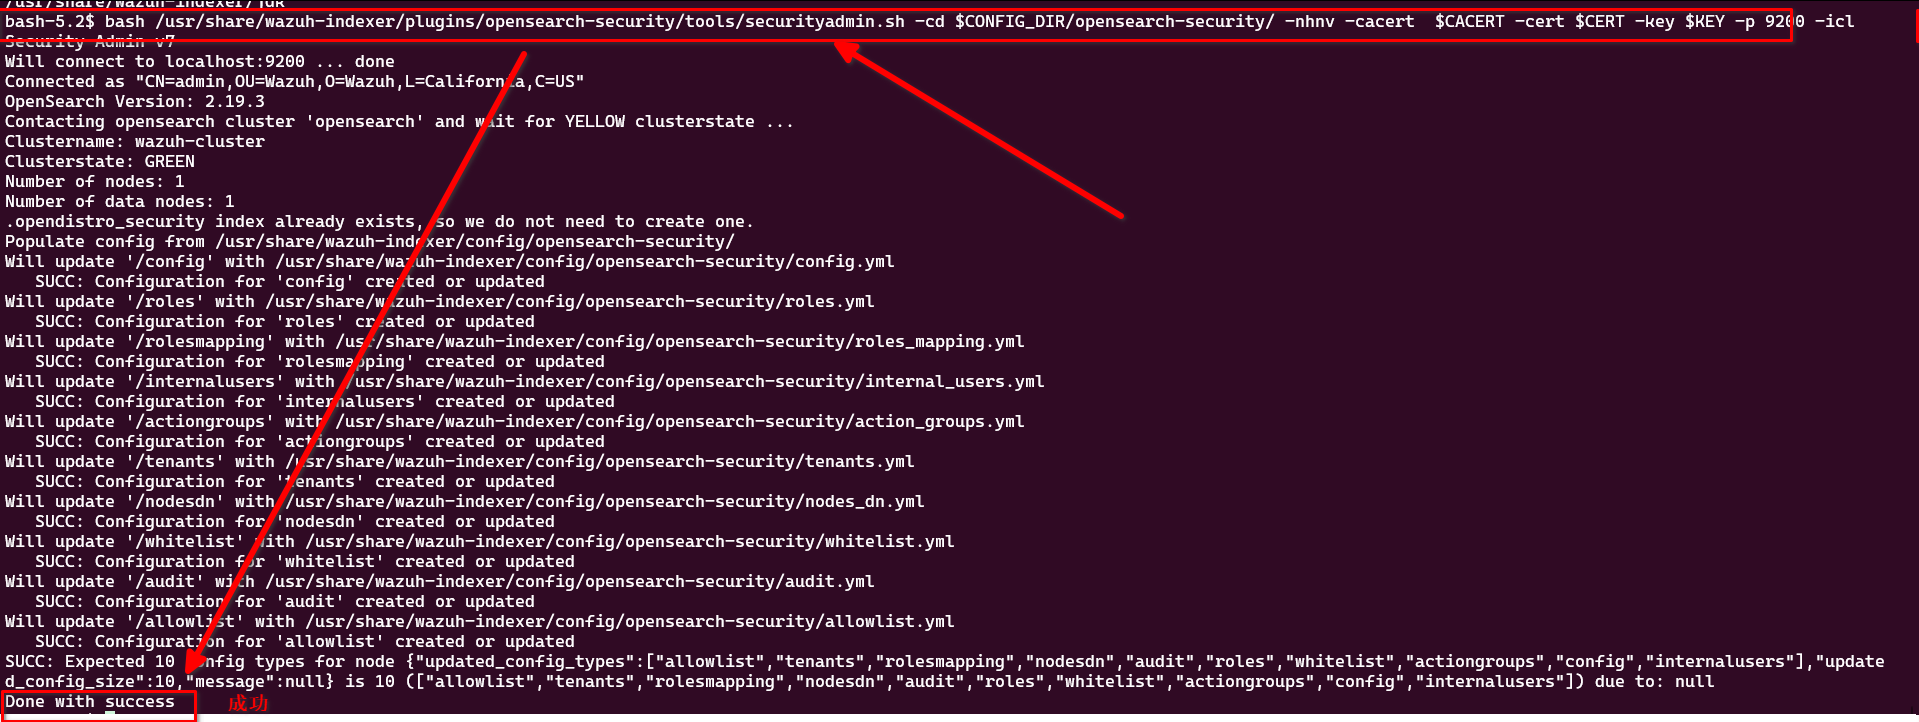
4. 运行这个命令:
bash /usr/share/wazuh-indexer/plugins/opensearch-security/tools/securityadmin.sh -cd $CONFIG_DIR/opensearch-security/ -nhnv -cacert $CACERT -cert $CERT -key $KEY -p 9200 -icl
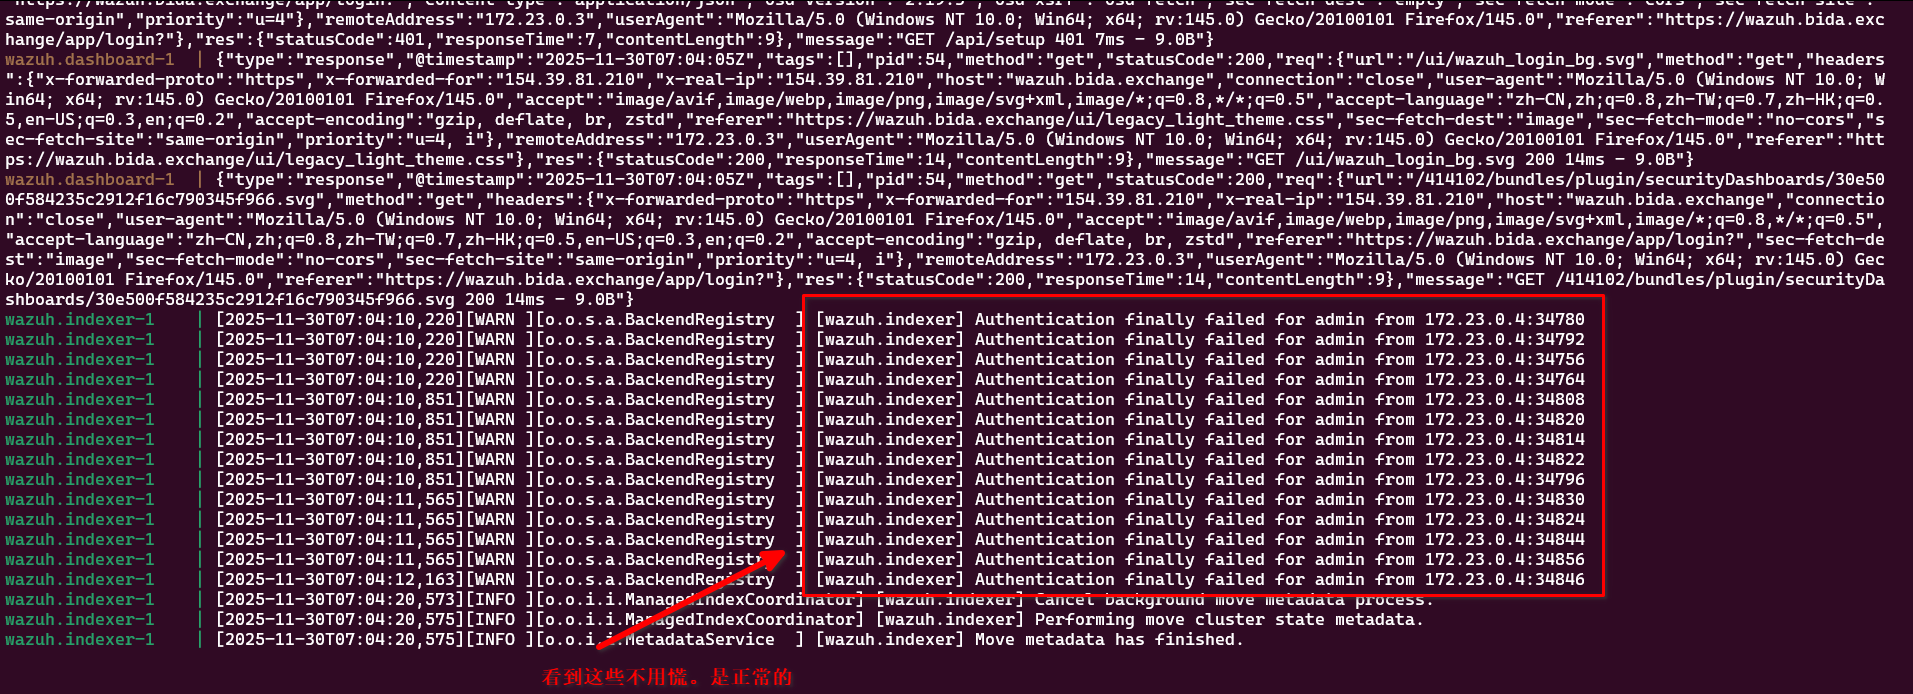
5. 切换到浏览器,ctrl + F5 强制刷新页面, 直接登录即可。
问题1:修改密码后就不可以用了,如何恢复?
1. docker compose down.
2. 删掉所有相关的 docker:
docker rm single-node-wazuh.dashboard-1 single-node-wazuh.indexer-1 single-node-wazuh.manager-1
3. 删掉所有的 volume:
docker volume rm single-node_filebeat_etc single-node_filebeat_var single-node_wazuh-dashboard-config single-node_wazuh-dashboard-custom single-node_wazuh-indexer-data single-node_wazuh_active_response single-node_wazuh_agentless single-node_wazuh_api_configuration single-node_wazuh_etc single-node_wazuh_integrations single-node_wazuh_logs single-node_wazuh_queue single-node_wazuh_var_multigroups single-node_wazuh_wodles
4. 删掉config 文件夹,
rm config -rf
5. 恢复它:
git checkout config
6. 确认config 文件夹中没有参与的东西:
find config | grep pem (结果为空)

创建本地文件夹(非常重要?!)mkdir ./config/wazuh_indexer_ssl_certs
7. 修复docker-compose.yml 的内容(用户名密码,恢复到默认)
清理 构建缓存: docker builder prune -a
8. docker-compose -f generate-indexer-certs.yml run --rm generator
9. 启动:
docker-compose up -d --force-recreate
问题2: 如何修改密码?
1. 参考(注意,只参考它不行):https://documentation.wazuh.com/current/deployment-options/docker/changing-default-password.html#wazuh-server-api-users
2. 还要参考:https://www.reddit.com/r/Wazuh/comments/1cpu1f8/if_youre_having_trouble_changing_the_admin/
以及(可选,这个是历史源头): https://www.reddit.com/r/Wazuh/comments/15c6xv8/issues_resetting_wazuh_docker_manager_default/
总之,就是:
(1) 密码长度必须是14位,不能有特殊字符
(2) 一次只修改一个用户的密码(例如 只修改kibanaserver )
(3) 清空浏览器的缓存。
问题3. dashboard 默认的用户名密码?
admin - SecretPassword
kibanaserver - kibanaserver
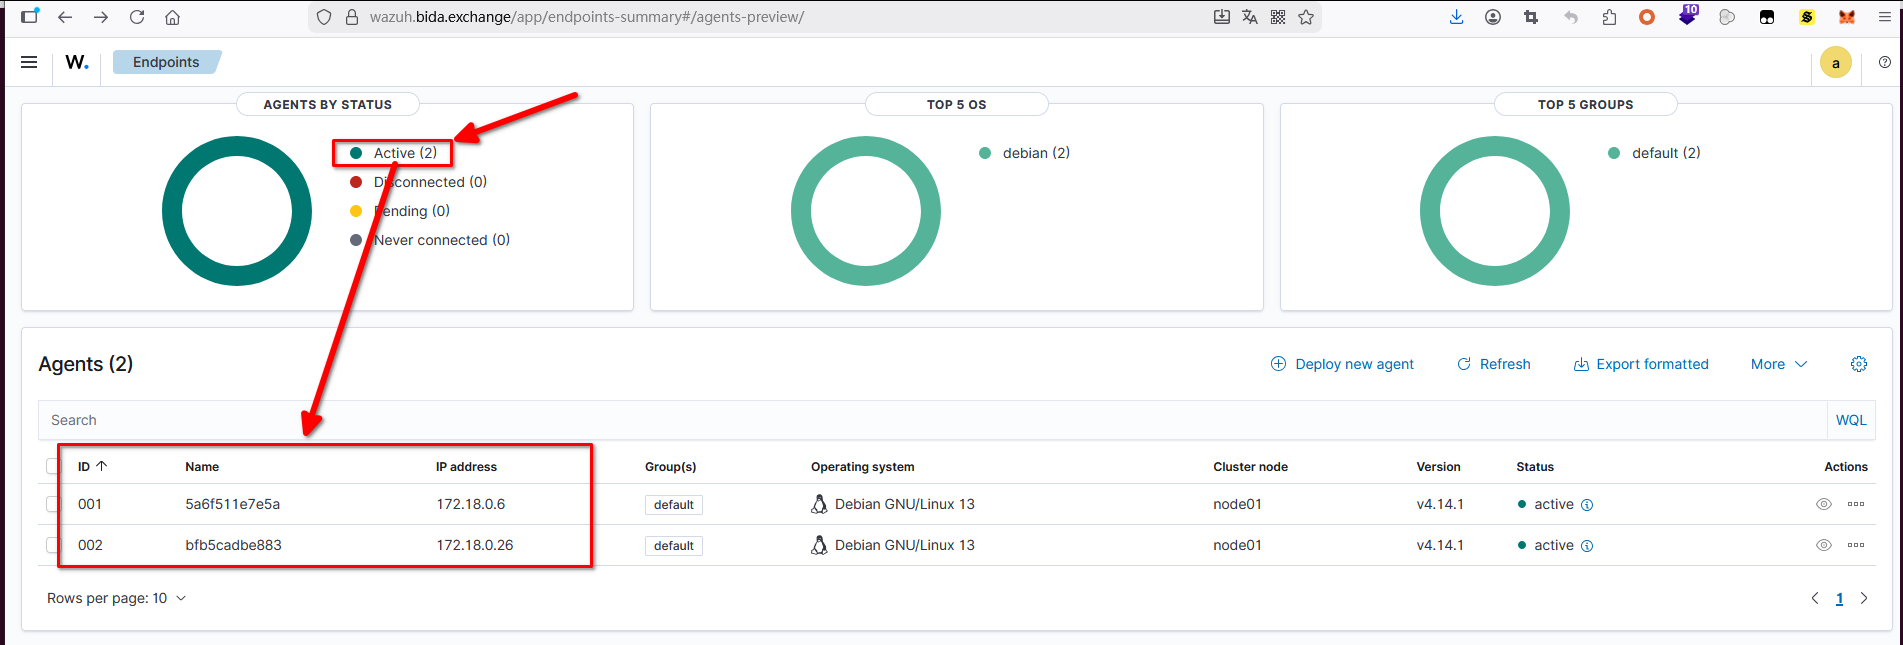
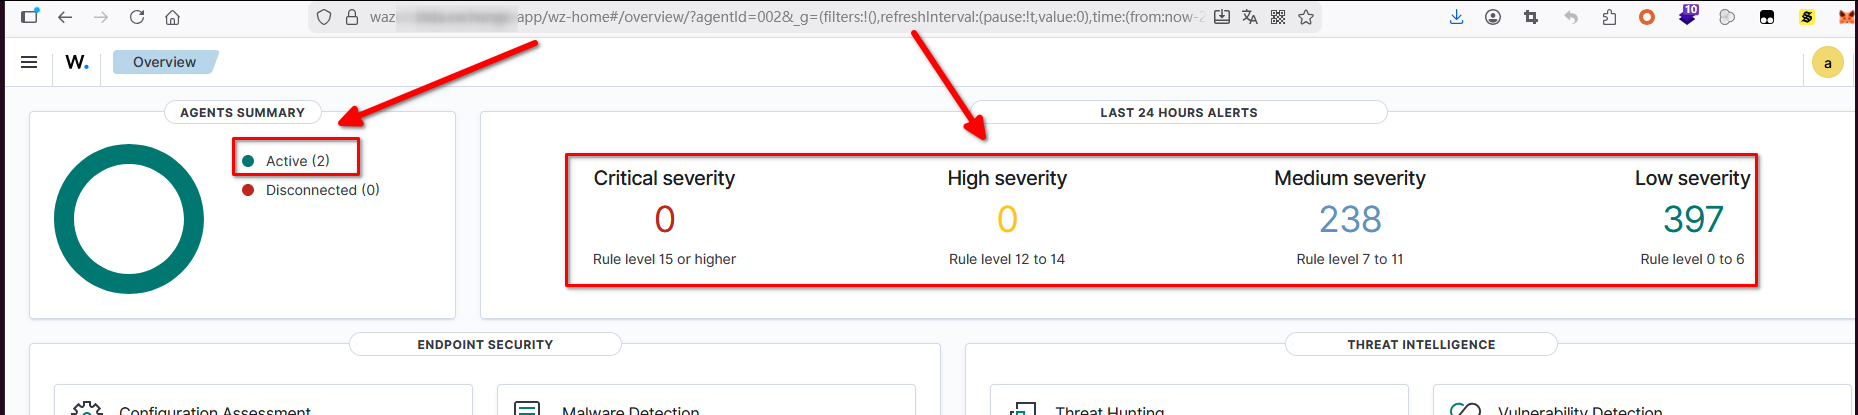
折腾了2天,(2025.11.29-30) ,看一下我的成果哈哈: